

Ux Power Tools Design System

Sketch Tutorials
A Quick Start Guide to UX Power Tools
It's so easy you'll wonder why you ever designed any other way.
![]()
UX Power Tools is the most advanced Sketch design system ever made. It's like Bootstrap for designers. All the hard work is already done for you, so you get to focus on the fun part: actually designing.
Styles, symbols, and special techniques will make you a more efficient designer, and help you craft more consistent designs.
This Quick Start Guide is meant to show you the basics of customizing and scaling the system to match your brand and fit into your design process.
Contents of the Quick Start Guide
1. Intro: Just an intro!
2. Setup: Before You Open the File(s)
3. Colors: Customizing and Adding Colors
4. Typography: Changing the Font and Font Colors
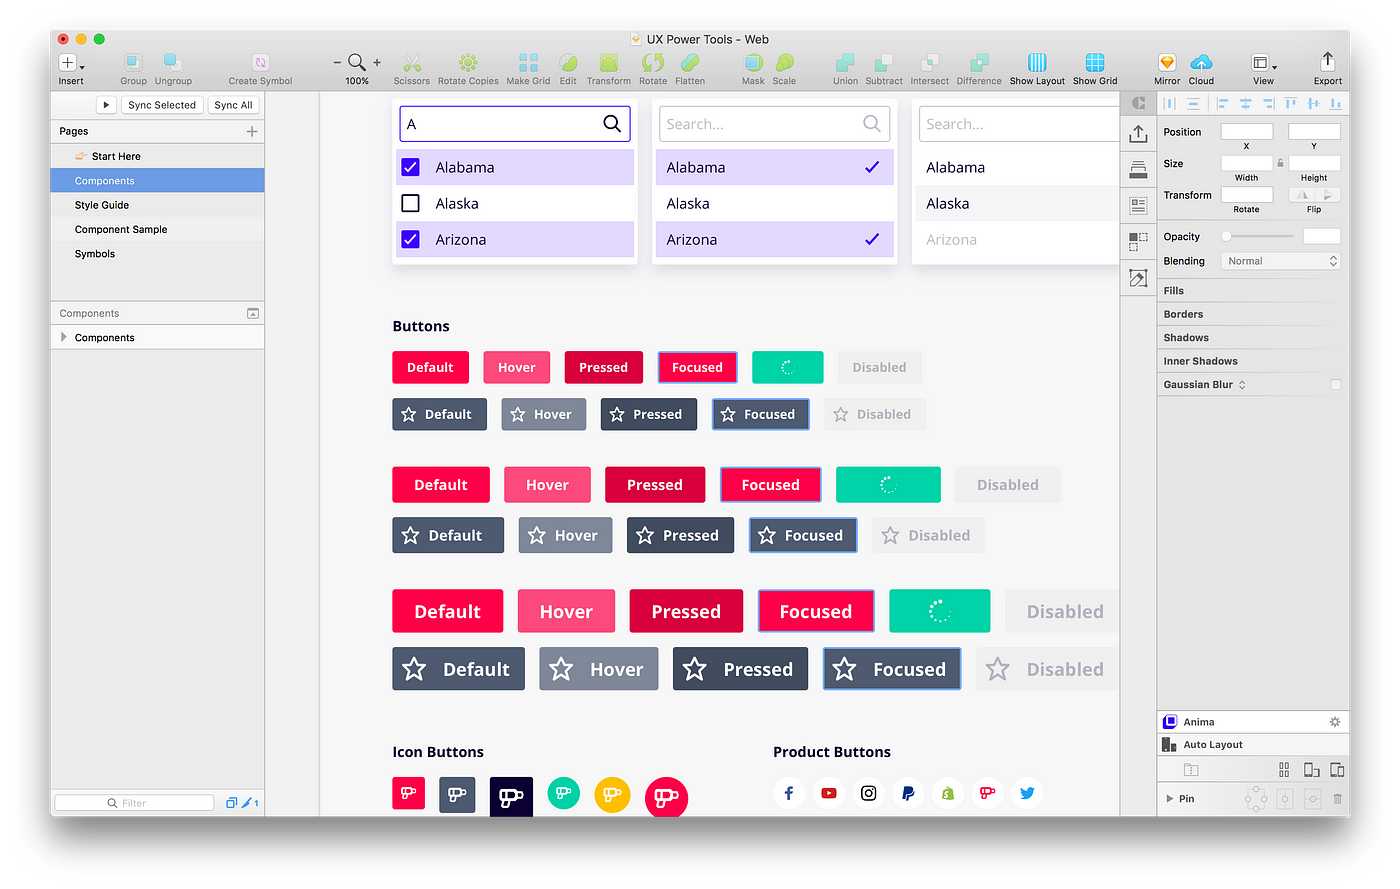
5. Symbols: Intro to Symbols
6. Icons: Swapping Icons and Adding New Ones
7. Fields: Customizing Input Fields
8. Buttons: Customizing Buttons
9. Other Customizations: Shadows, Scrims, and More!
10. Summary: Breathe a little!
11. Help: More help + Custom Services
1. Intro
I'm a full-time product designer for a digital agency, and I help spin up anywhere from 12–20 design systems and frameworks a year for new client projects. I built UX Power Tools out of necessity so I could be more efficient, and it has increased my productivity almost 10-fold.
Once you learn the basics of the system and get things under your fingers, you'll be designing more accurately, more consistently, and more efficiently. Thousands of amateur and pro designers around the world at companies big and small are using UX Power Tools to accelerate their workflows.
This Quick Start Guide works for both the web system and the mobile system, so you only have to learn it once!
Let's do ittttttt!

2. Setup
Install the Open Sans font
It's available free from Google, and also comes alongside with the package itself. It's noted in the readme and Sketch will notify you as well. At this point we're just nagging! Anyway, you can change this later but it's good to make sure it's installed to begin so you don't throw off your symbols.
Change Your Nudging Settings
The system is all based on an 8-pixel grid so you can save yourself a lot of headache by changing your nudge settings from 10px to 8px.
…
Everything installed? Wonderful!
3. Colors
This is the best way to start, so we've aptly named the page "Start Here". It's pretty hard to mess this up, people :)
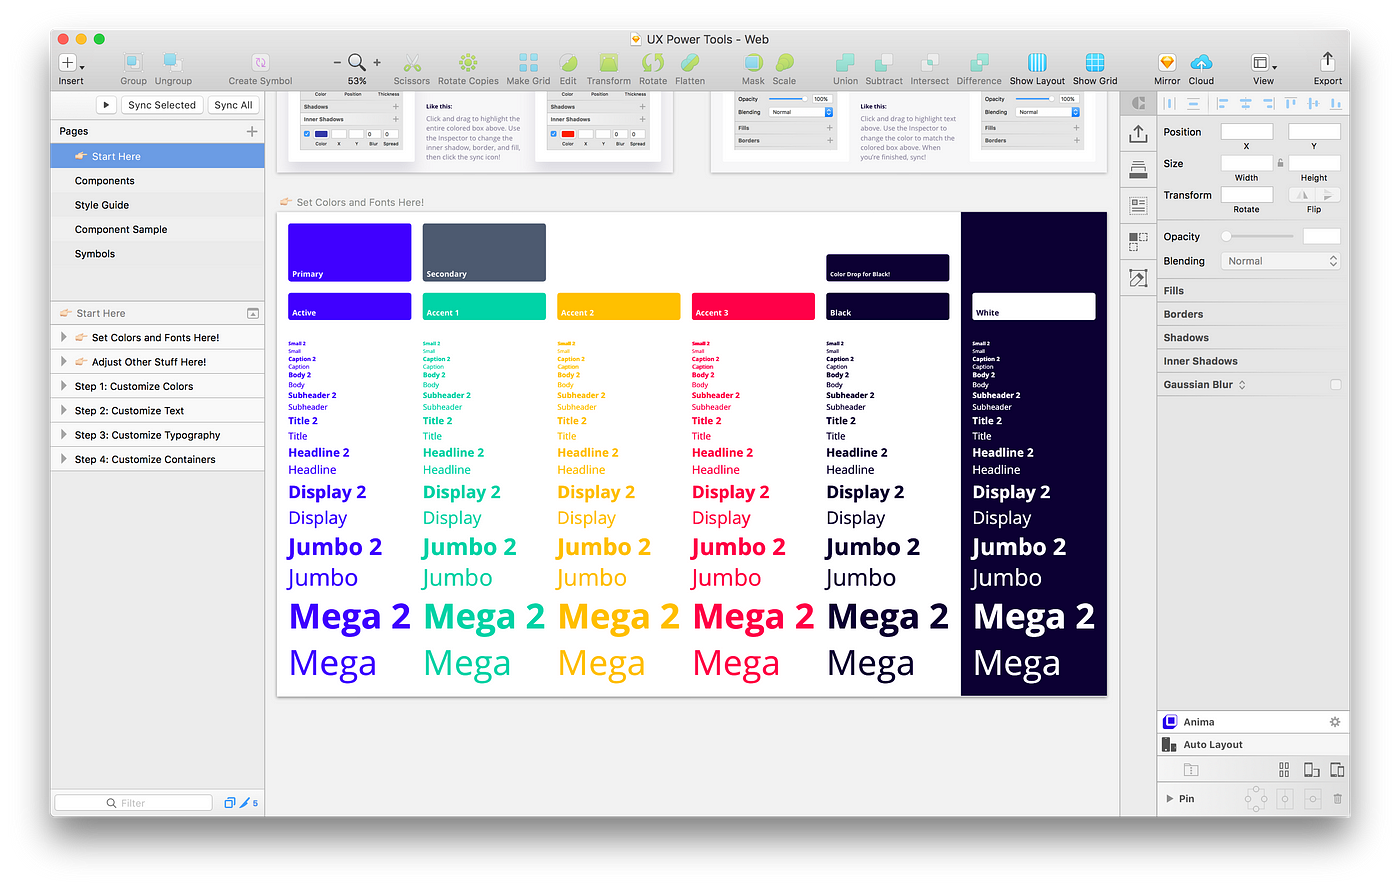
There are some tutorials on this page that you're welcome to follow, but this Quick Start Guide will walk you through the same process in more detail.
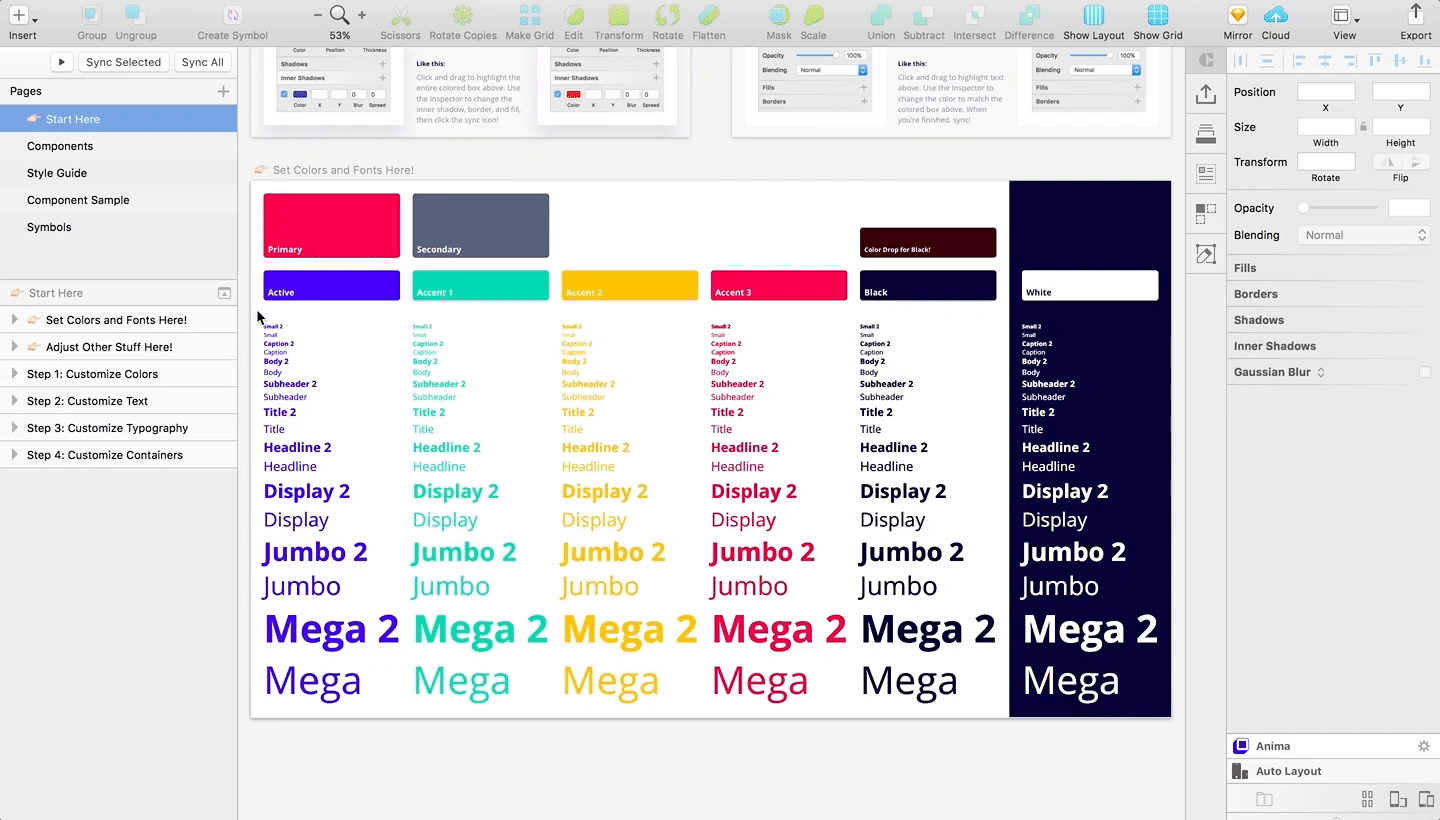
💡Style Stacks™
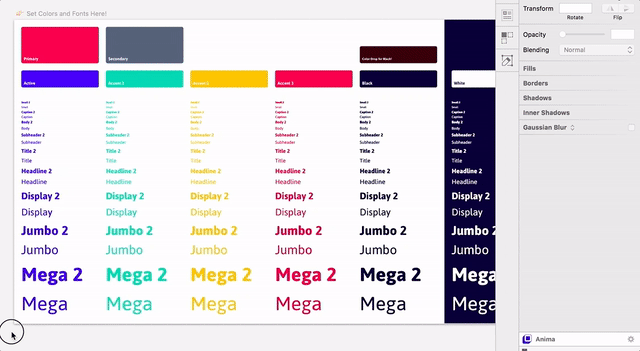
UX Power Tools utilizes a little efficiency trick called Style Stacks™ (patent pending) to make it super easy to bulk-update lots of layer styles at once. Those blocks of color you see across the "Set Colors and Fonts Here" artboard are actually stacks of rectangles, each with a different layer style applied to it. This allows us to quickly update all of those layer styles at the same time. Convenient!
How to Customize the Colors
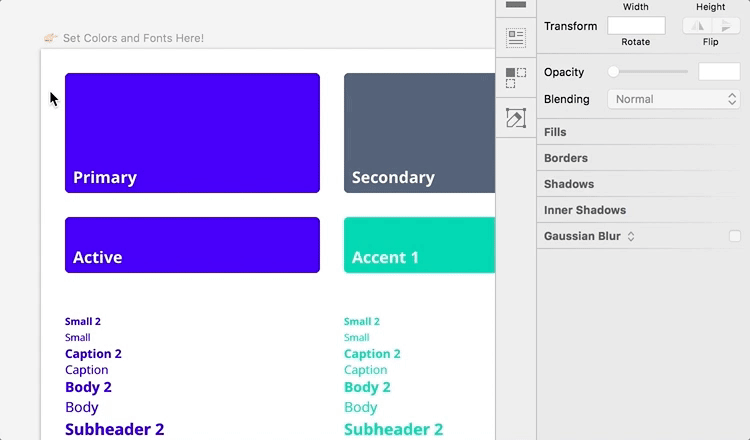
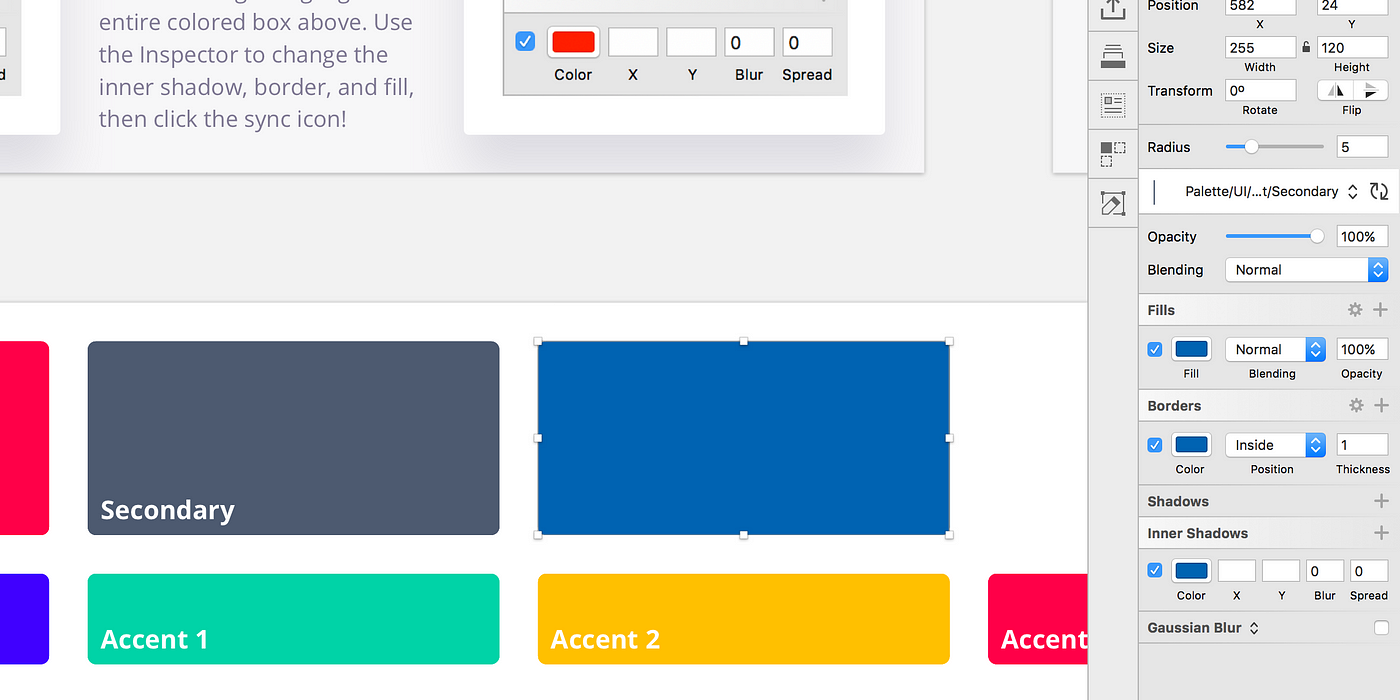
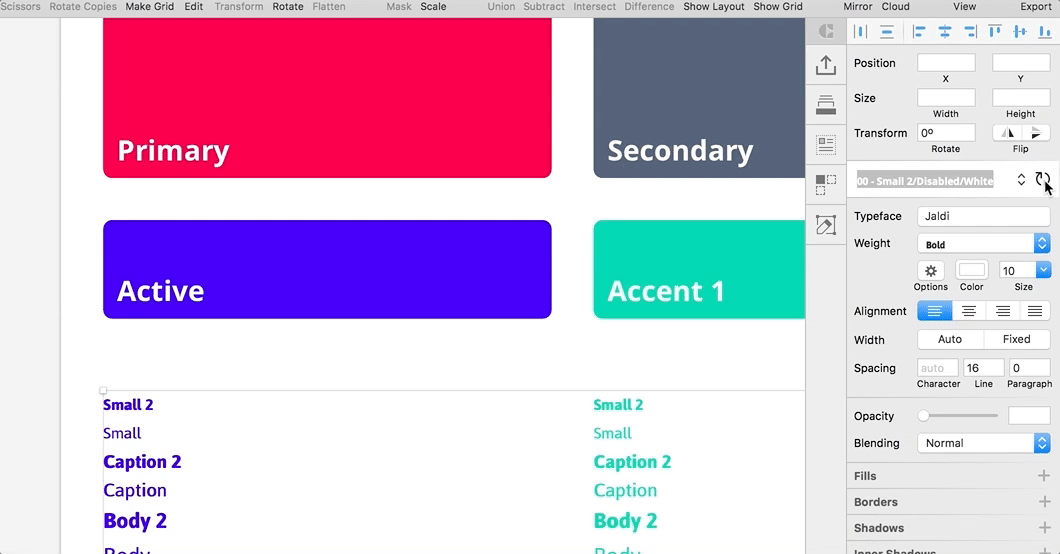
Step 1
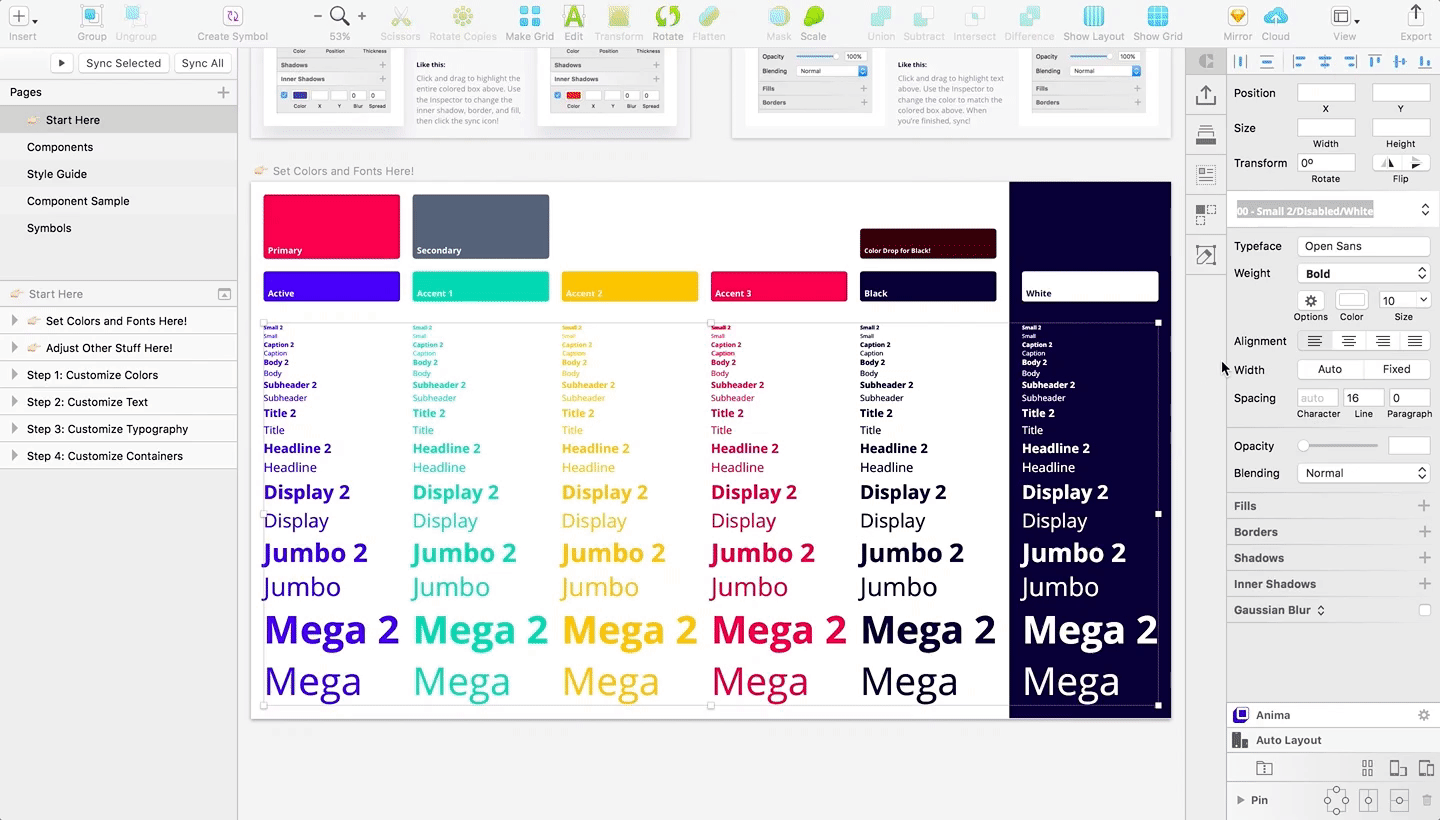
Click and drag to select the block of color. I like to start with my primary brand color, so I'll select "Primary". Do not just click the block. There are multiple rectangles in this stack, and you have to select them all.
Step 2
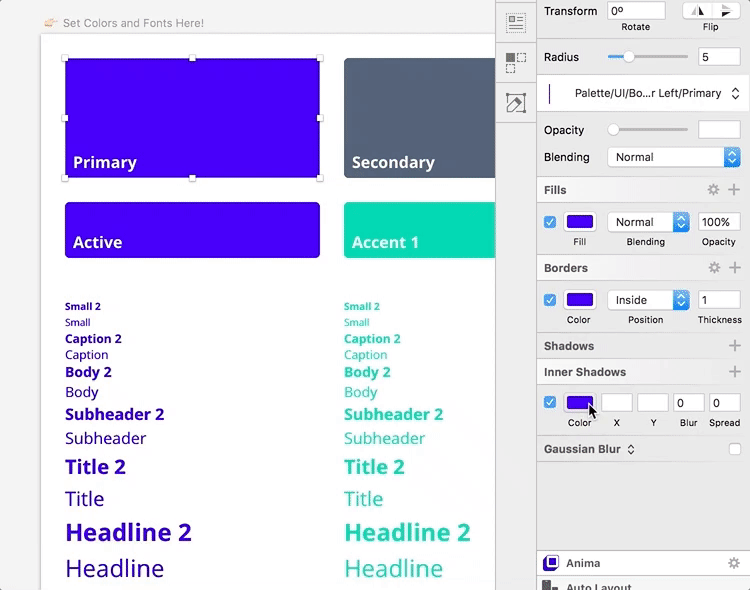
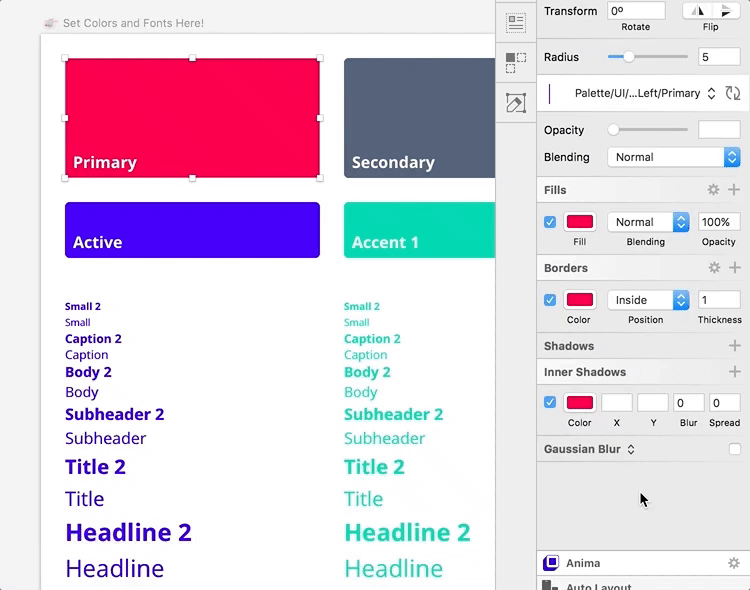
See how the Inspector shows Fills, Borders, and Inner Shadows? That's because there are rectangles in this Style Stack that have one or more of these attributes. Pick a color, and update each of these color values. I like to go from the bottom up because that color picker can get in the way:
Step 3
Sync your changes. Sketch is super fancy and despite these attributes applying to multiple different layer styles, it syncs these changes to each respective layer style (fill, border, border left, border bottom, etc):
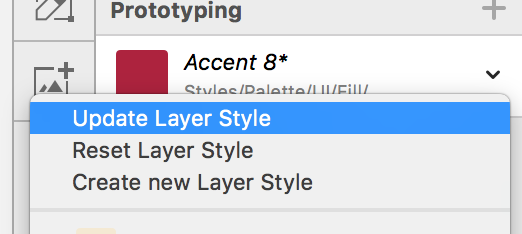
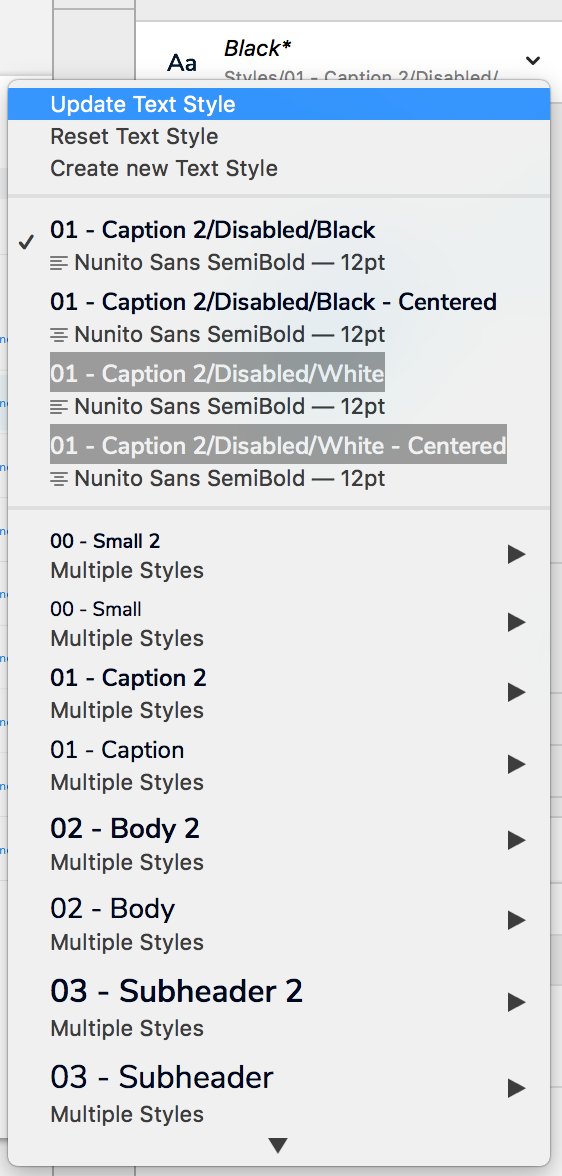
SKETCH UPDATE (8/31/2018):
Updating and syncing styles has been moved to the style dropdown menu. Just click "Update Layer Style" to save your color changes :)
A quick way to see if everything worked is to check the Components page (if you're using the web system), or the Style Guide page (if you're using the mobile system). You should see your pretty new color:
Hey look, our color! The Palette/UI/Fill layer styles are most frequently used throughout the system, but you'll also see the border styles have been updated if you open up the layer styles dropdown in the Inspector. These styles are useful on the symbols page. We'll get to those later.
Continue doing this for the other style stacks on the artboard to fill out your brand colors. Here's a quick rundown of how UXPT uses color:
- Primary: Your primary brand color
- Secondary: Your secondary brand color (if you have one)
- Active: This is what I use for checkboxes, radios, and other active states. I tend to use the primary brand color for this, but you don't have to.
- Accent 1: Your "success" color
- Accent 2: Your "warning" color
- Accent 3: Your "error" color
- Black: Your base black. I recommend using a tinted black (see FAQ)
- White: Your base white. I usually just use #FFFFFF, but beige is cool too.
🙃 FAQs
Why didn't my text colors update when I synced my color change(s)?
Text Styles and Layer Styles are different. We're just updating Layer Styles in this step. Don't worry, we'll get to the Text Styles in the next section. I'm not seeing the color change on other pages!
Make sure you drag to select the whole Style Stack and don't just click the rectangle on top. And don't forget to sync! What does the "Color Drop for Black" mean?
I rarely use pure black (#000000) when I design. Instead, I like to use black that is tinted toward my primary brand color. This color drop rectangle is your primary color with an 80% pure black rectangle on top of it. It's a good starting place to color drop for a tinted black color. Why only 8 colors?
Keep it simple. I advocate using color very deliberately in UI, so I find there's rarely a need for more colors than this. That's not a hard rule, but it works for me! Feel free to add more. Which brings us conveniently to…
How to Add More Colors
Sometimes you want a tertiary color or other accents to use throughout your designs. Adding a new color is easy:
- Drag to select an existing color Style Stack like we did before.
- Copy the contents of the stack with Command+C.
- Paste this copy of the stack somewhere on the color artboard.
- Update the colors like we did before, but do not sync yet.
- Group this style stack (this'll make it easy to go through all of the items in the stack). Now go into the style stack group and select the top rectangle. Go to your layer styles dropdown in the Inspector and scroll to the very bottom. Select "Create New Shared Style". Give it a new name.
- Repeat Step 5 until you've created new layer styles for each rectangle in your new style stack group. When you're finished, you can ungroup it so they're easy to drag-select later.
- Done! We'll create color symbols for these later in Section 5: Symbols.
4. Typography
Typography gives your app a voice, so in this section you'll learn how to customize the font.
Conveniently, we can do everything from the same page ("Start Here") where we customized our colors:
First things first. This is not a bug:
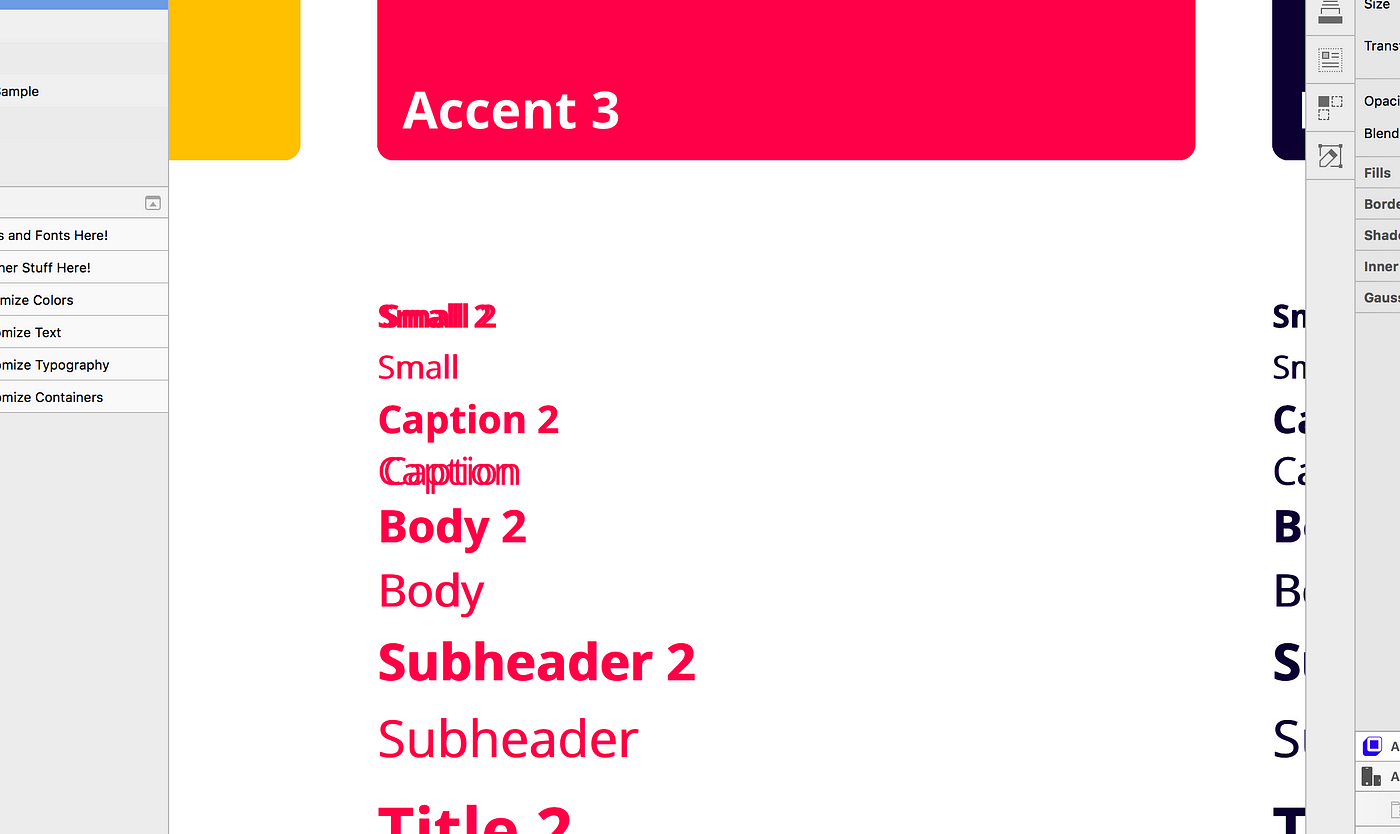
Just like with our colors, we use style stacks to help us quickly change multiple text styles at once. So even though it looks like you're only changing 18 black text styles, in certain cases you're actually changing 72 text styles of different transparencies and alignments:
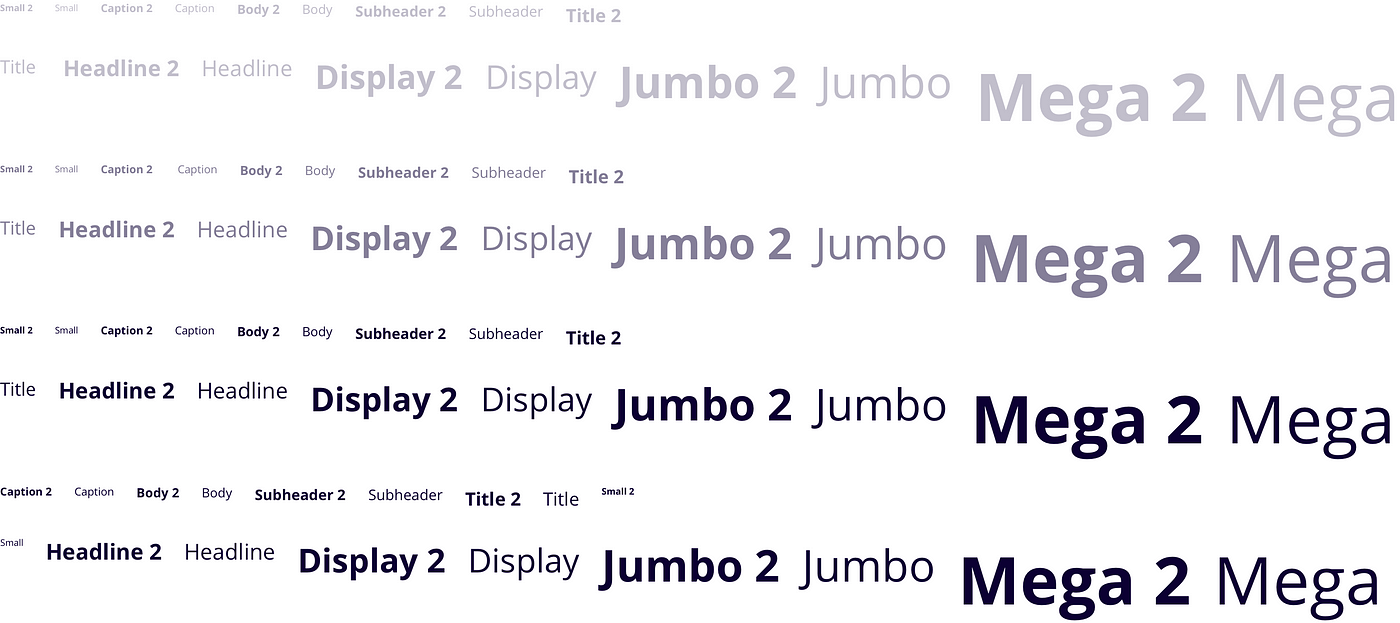
The reason why things might look a little misaligned in the earlier screenshot is because some of the text styles are center-aligned, and some of the text styles are left-aligned. Sometimes there are tiny variances in the letter spacing, so they might not line up perfectly. This does not have any negative effect on the system. It's purely a cosmetic quirk.
How to Customize the Font
Step 1
Drag to select all of the text on the "Start Here" artboard:
Step 2
Choose a new typeface in the Inspector panel. Be careful arrowing through fonts in the dropdown. If you encounter a font that doesn't have a bold variation, then it will get rid of the "Bold" font weight for the text styles ending in "…2" and you won't see bold text in all of the artboard text styles as you continue arrowing through fonts.
Step 3
Sync your changes, and you're done! If you did it right, you'll see your font update across the entire file:
SKETCH UPDATE (8/31/2018):
Updating and syncing styles has been moved to the style dropdown menu. Just click "Update Layer Style" to save your color changes :)
🙃 FAQs
What are the "…2" text styles?
They're the bold version of their counterparts. We use a number so that it's open to whatever you want. Sometimes semi-bold, medium, or black would be used for this style.How can I quickly change the bold text styles to be more/less bold?
In the layers list, search for " 2" (put a space before the 2), select all of the text layers, then change your font weight in the Inspector panel. Sync!What's with this "Small, Caption, Body…" naming convention?
These names are purely for recall. That means you don't have to use "Body" for body text. When we built the system, traditional "XS, S, M, L, XL, XXL" size names were hard to remember, so we opted to give them names instead. Feel free to change them if you'd like!What does Normal, Secondary, and Disabled mean in the text styles?
Those are different shades of that text style color. Normal is 100% opaque, Secondary is 50% opaque, and Disabled is 25% opaque. Transparencies are preferred because if you use them on top of a color, they will be tinted toward that color. Example: 50% transparent white text on a red background will look slightly pink. Over blue, it'll be light blue.I updated my font and now components are line-wrapping!
Don't worry! The majority of components in the system have left-aligned text symbols, so all you have to do is make your component a little wider. As soon as text no longer wraps to a new line, your component will have even padding on both sides.I updated my font and now TEXT SYMBOLS are line-wrapping!
This actually doesn't break anything! It's just a cosmetic side effect of some typefaces having wider kerning . Do not make text symbols wider. If it really bothers you, just change the value inside of the text symbol(s) to something shorter like "…" or "abc".I updated my font and now text isn't vertically centered in symbol(s)!
We had to get a little clever with the way text symbols (next section) were created so that updating the font was as easy and as painless as possible. Sometimes when you update the font, the text layers in the accompanying text symbols will shift up or down inside of the symbol artboard, throwing off the vertical alignment. Just realign the text to the center of the symbol artboard(s), and everything should be back to normal.
Changing Text Colors
Step 1
Drag to select a column of text styles, the choose your new color:
Step 2
Sync your changes!
Step 3
Continue doing this for all of the other columns of text styles. I usually just color drop from rectangles above each column.
Step 4
Done!
Symbols
Every single layer in UX Power Tools is tied to either a layer style, text style, or symbol. Just like in CSS, everything is centralized, so if we ever need to make updates to our system, it's easy to sync them throughout our design.
For this very reason, symbols are the crux of the entire file. Symbols are built using the layer styles and text styles we just defined, and with other nested symbols so that making changes is effortless.
The entire system is built using FOUR categories of symbols:
1. Text Symbols
Sketch allows your to overwrite a symbol's text value, but it won't allow you to overwrite text styles used within that symbol. So text symbols are a clever workaround for this limitation. Since we can override and swap nested symbols, we've created symbols out of each of our text styles to allow us to change the style of our text. Example: I want to use dark text on a button with a light background, and light text on a button with a dark background. Nested text symbols allow us to do this! See them in action below:
2. Fill & Border Color Symbols (aka "Mixins")
Symbol overrides will be your best friend in UX Power Tools, and Fill/Border symbols will change your life. Just like text symbols allow us to override the text style of a symbol, color symbols allow us to override fills and borders. Any time you think you use or create a symbol that might change color, it's best to use a nested color symbol. See them in action below:
3. Container Symbols
Containers give elements like buttons, badges, and chips their shape. They're built using color symbols, state symbols, and masks. Change the shape of a component or the state of a text field by overriding its container. See them in action below:

4. State Symbols
State symbols help you add a sense of interaction to components like buttons, chips, and badges. They're always nested inside of another symbol atop a color fill because they use blending modes to lighten, darken, or desaturate the color of the component. Any component using a container symbol will automatically "inherit" states since they are nested inside of the container symbol itself. Note: States are purely cosmetic to show developers how a hover/pressed/focus state should look. Since we're using blending modes, developers won't be able to use Zeplin or InVision Inspect for these states. Instead, I recommend they use lighten() and darken() functions in LESS or Sass to achieve these results in code.
🙃 FAQs
How do I add new fills so they're available in the dropdown(s)?
Duplicate one of the Mixin/Fill artboards on the Symbols page, choose a new color for the rectangle, then add a layer style for your new color. Adding the layer style is optional, but we recommend always using layer styles so it's quick to update later if you end up using it in multiple places. Caution: Do not change the size of this artboard. It needs to be the exact same size as all of the other Mixin/Fill artboards in order for it to appear in the Inspector panel dropdown.
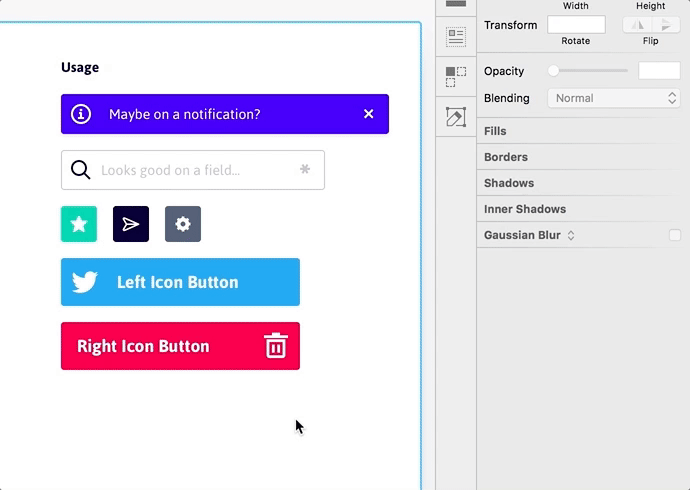
Icons
Icons are probably the most tedious part of the kit, but they'll end up saving you a ton of time in the long run. Using this technique, we make our icons masks, then put a Mixin/Fill symbol over it.
Because Sketch lets us override symbols, we can swap the color of this icon to any color we've added as a symbol!

How to Swap an Icon
Swapping icons is super easy using the override panel in the Inspector:
How to Add an Icon
- Duplicate an existing icon, then delete the mask layer.
- Paste in your new icon, and make sure you create a single path. You can do this with Layer→Combine→Union or Layer→Combine→Difference.
- Remove all fills on the icon path. No fills!
- Put your icon path beneath the "↳ 🎨Color" layer.
- Make the icon a mask (press Control+Command+M).
- Done!
🙃 FAQs
This takes forever.
It's not optimized in the beginning, but you'll gain all of that time back in the long run. Promise.Is there a faster way?
Not that I know of. If someone wants to make an icon set of masks, that'll sure make this process a helluva lot faster, though!Is this icon method supported in Zeplin, InVision, [dev handoff tool]?
I usually send my dev team(s) the actual icon font and/or SVG sprite, so I don't worry about this too much. That said, Zeplin does a great job reading color overrides, and usually allows you to export the SVGs just fine.My icon isn't showing up in the icon override dropdown!
Make sure the icon artboard is the exact same size as all of the other icon artboards. If it's not, then it won't show up.
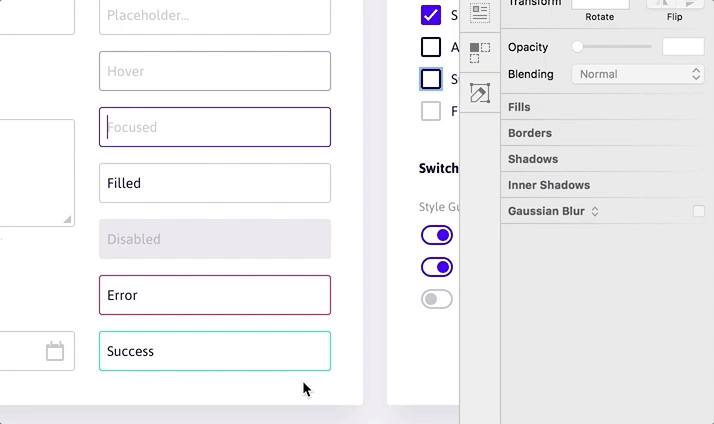
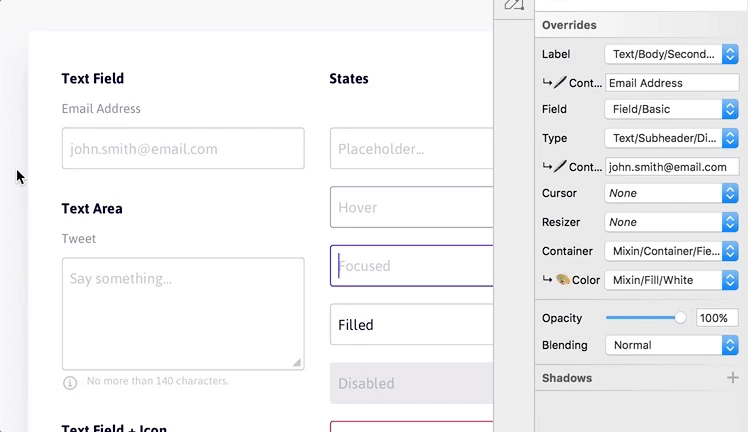
Fields
Fields (or inputs…whichever you fancy) are made up of two primary pieces: a container and some text. Both the container and text are symbols so that we can easily override them to suit various situations.
Like all symbols in the system, text fields are completely resizable. If text doesn't fit, just make it wider or taller.
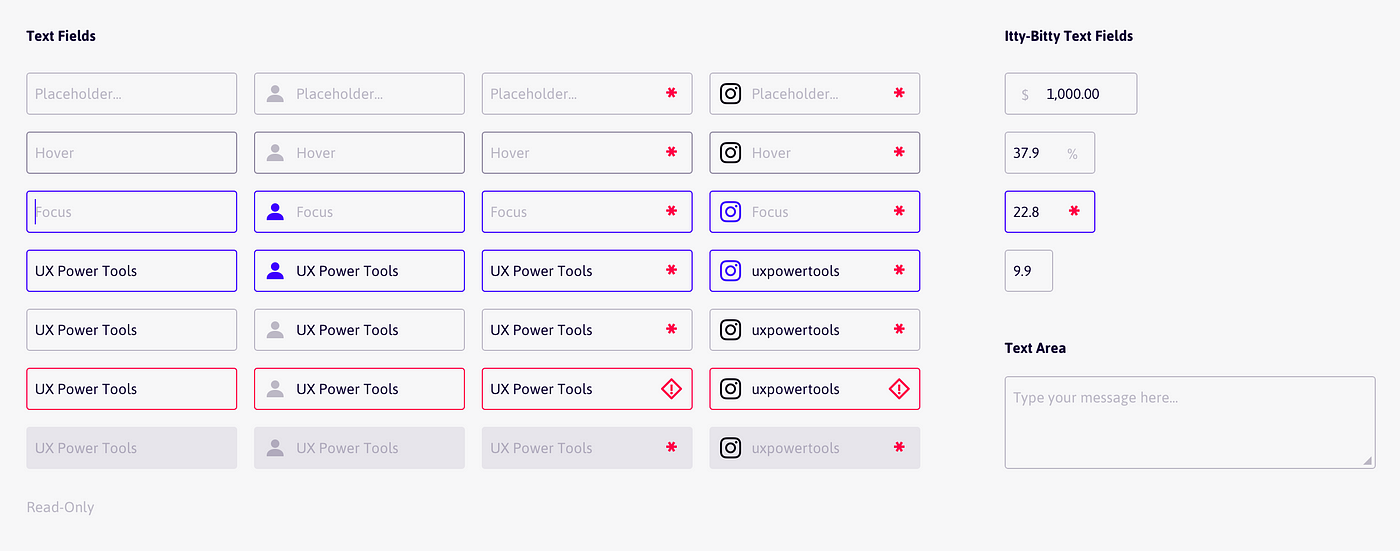
Customizing Fields
If you want to change the shape or style of a text field, most of the work should be done on the Mixin/Container/Field symbol(s):

- Borderless Fields: Remove the "Border" layer.
- Fields with a Shadow: Add a shadow to the "Mask" layer.
- Hard-Corner Fields: Set the border radius of the Mixin/Border symbols and the Container/Field mask to zero.
- Material Design Fields: Make hard-corner fields, then change the "Border" layer to Mixin/Border/Bottom-Active. You'll have to create another bottom border mixin symbol for the default state.
🙃 FAQs
What's the "Resizer" icon?
That's for when you're trying to represent a text area. Feel free to delete this if you don't think you'll need it.Can I delete the "Cursor" symbol?
Sure! I find it useful from time to time, but it's up to you.
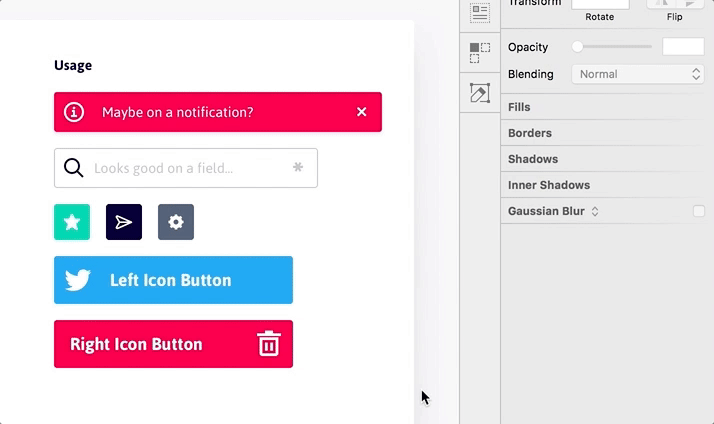
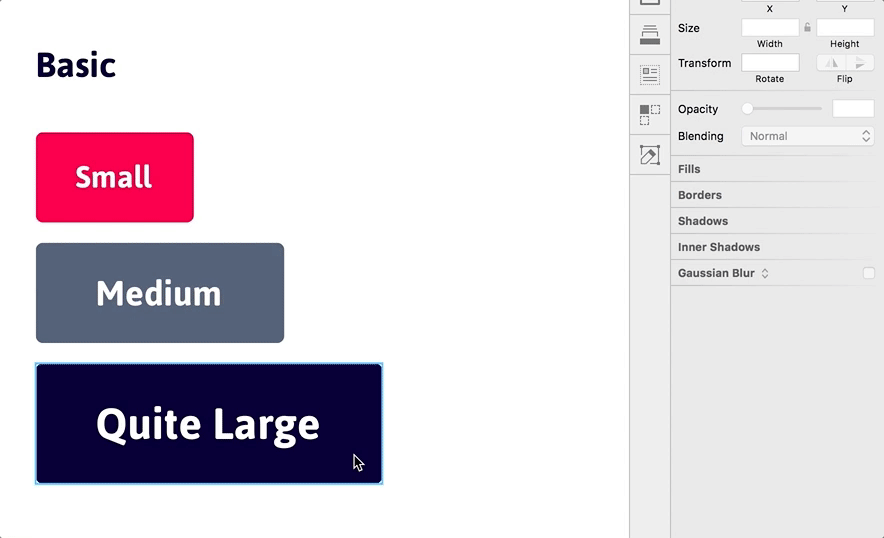
Buttons
Buttons are very similar to Fields in that they are constructed using other symbols. The nest text symbol in the button is set to resize, which ensure that perfect left/right padding is always maintained.
The best trick to ensure perfect padding is the 1px Nudge™. Simply resize your button right up until the text begins to wrap, then make it 1px wider:
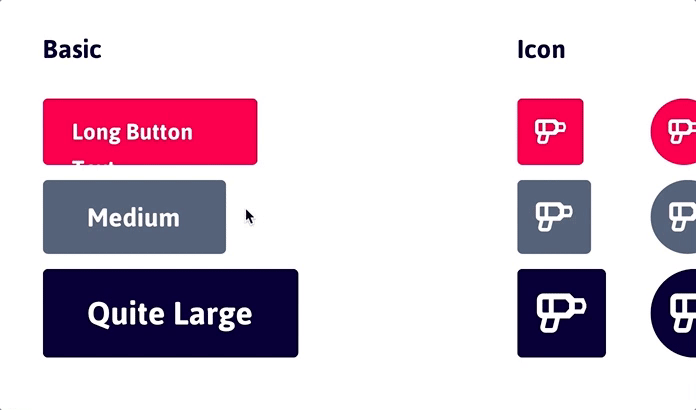
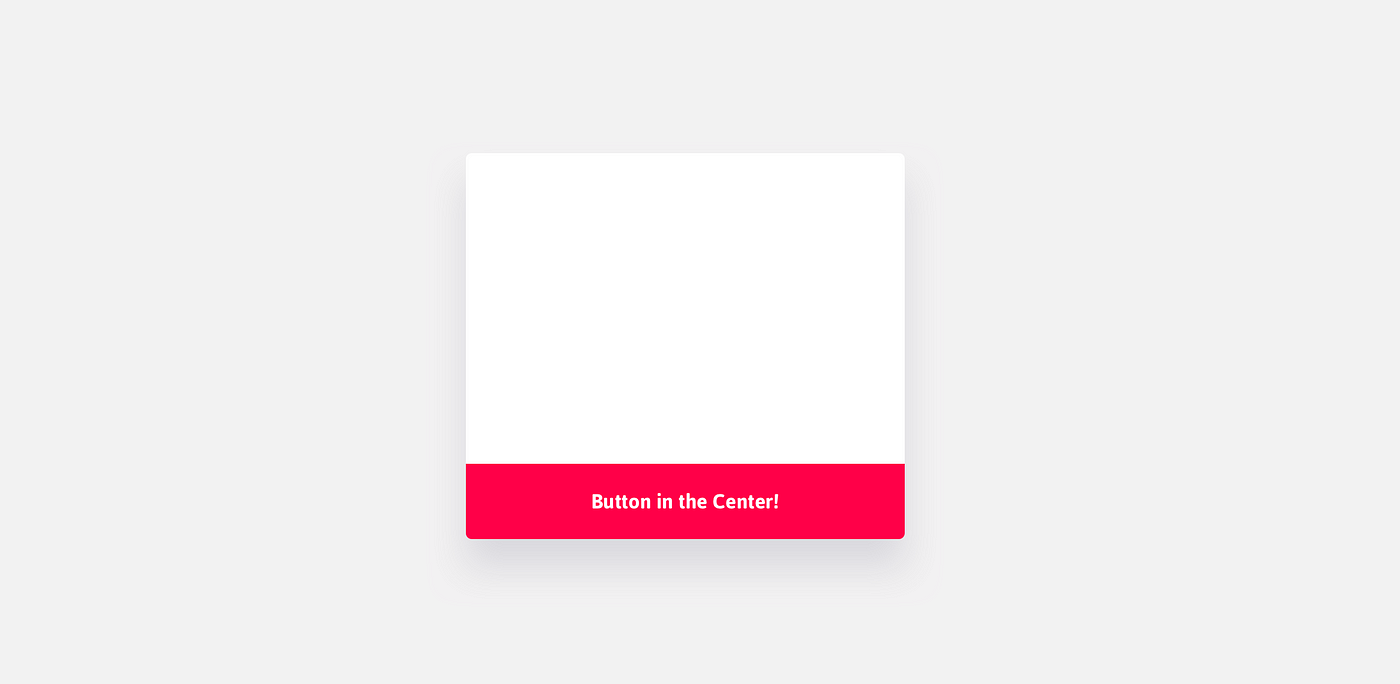
UX Power Tools also has a centered button in case you want to use it on the bottom of a modal (or something similar):
Customizing Buttons
If you want to change the shape or style of a button, most of the work should be done on the Mixin/Button symbol(s):

We've done most of the work to give you a bunch of button shapes to choose from, but if you want your default button shape to be rounder or harder, change the mask of Mixin/Button/Fill.
🙃 FAQs
How do I add a shadow to my button?
Select the Mask layer in a Mixin/Button container on the Symbols page and add a shadow. Don't forget to do all of the button containers.
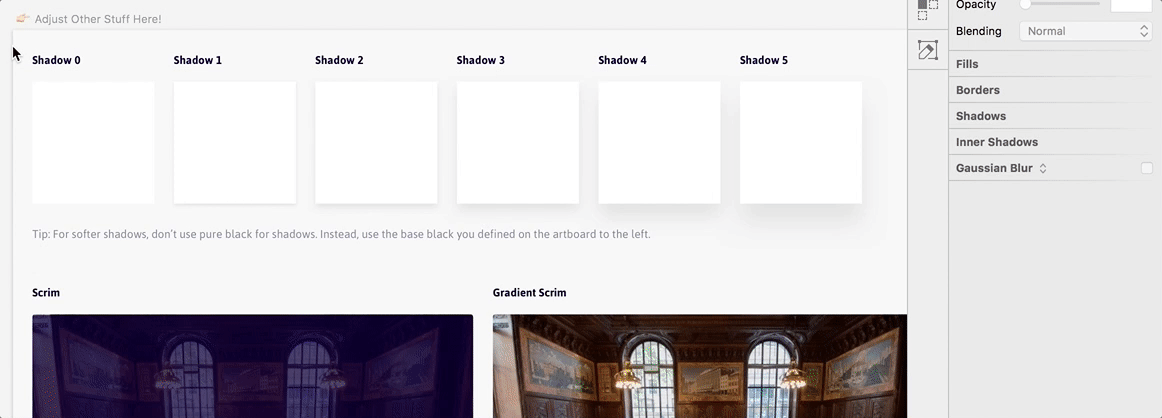
Other Customizations
On the "👉🏻 Start Here" page, there's a board to "👉🏻 Adjust Other Stuff Here!" This is where you can adjust things like shadows and scrims.
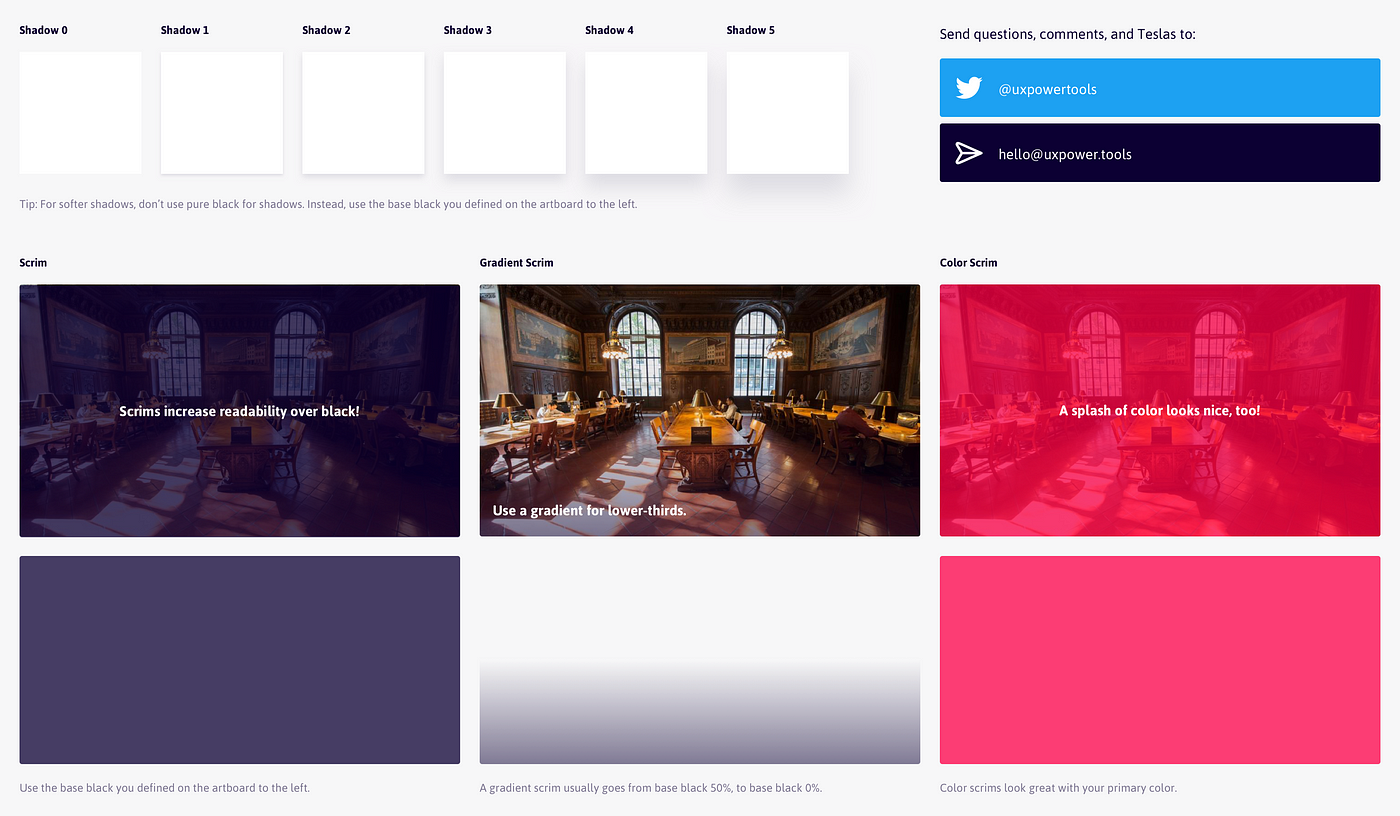
Customizing Solid Scrims
When you customize your colors on the "Start Here" page, the black and color scrims will automatically change for you. Feel free to play with the transparency level(s) until you find something you like. I put them over some image backgrounds to help you measure readability.
Customizing the Gradient Scrim
You will have to update the gradient scrim by hand. That's right, a hand-crafted scrim. I like to make a gradient scrim go from 50% of my base black, to 0% of my base black.
Customizing Shadows
There are 6 shadow levels for you to choose from. It's up to you to decide when and where you want to use them, but Material Design has some cool ideas around shadow usage as it pertains to "digital material".
I always advocate using your base black color for your shadows instead of pure black: #000000 (I was inspired by Ian Storm Taylor's article from 2012. This will give your app a softer feel, and shadows won't look so harsh. Updating them all at once is quick:
- Select your base black color and copy the hex value.
- Highlight all 6 of the shadow blocks.
- Open the shadow color picker and paste in your hex value.
- Hit enter.
- Sync, and done!
🏁 Summary
Congratulations on getting the fastest design system available for Sketch! I know this all looks pretty overwhelming, but you only have to do as much customizing as you want. Honestly, we think it looks pretty good out of the box. Swap out some colors and you're good to go.
Who should use it?
- UX Designers
- UI Designers
- Product Managers (for more accurate wireframing)
- Developers (who don't wanna mess with design)
- Enterprising CEOs (because why not?)
Still don't have the system?
Visit our site to read more about our two design systems (web and mobile), download a demo, or grab both of them below. Each system comes with a freebie of 70+ unique chart types (in dark and light themes) so that next time bossman asks for a "sexy dashboard like the ones I see on Dribbble," you won't roll your eyes completely out of your head 😄
Still need help?
- Say hi on email: hello@uxpower.tools
- …or Twitter
- …or Facebook
- …or LinkedIn
👉 Want a custom design system?
If all of this just looks too complicated, or if you're migrating from another app (Illustrator, Photoshop, Axure, Adobe XD, etc…), let us help you! Shoot us an email and we'll help get your team up and running in no time.
Ux Power Tools Design System
Source: https://medium.com/ux-power-tools/a-quick-start-guide-to-ux-power-tools-773d5b47ac85
Posted by: hernandezgoingwass02.blogspot.com
0 Response to "Ux Power Tools Design System"
Post a Comment